How to Crochet a Cheerful Daisy Cardigan (Free Pattern)
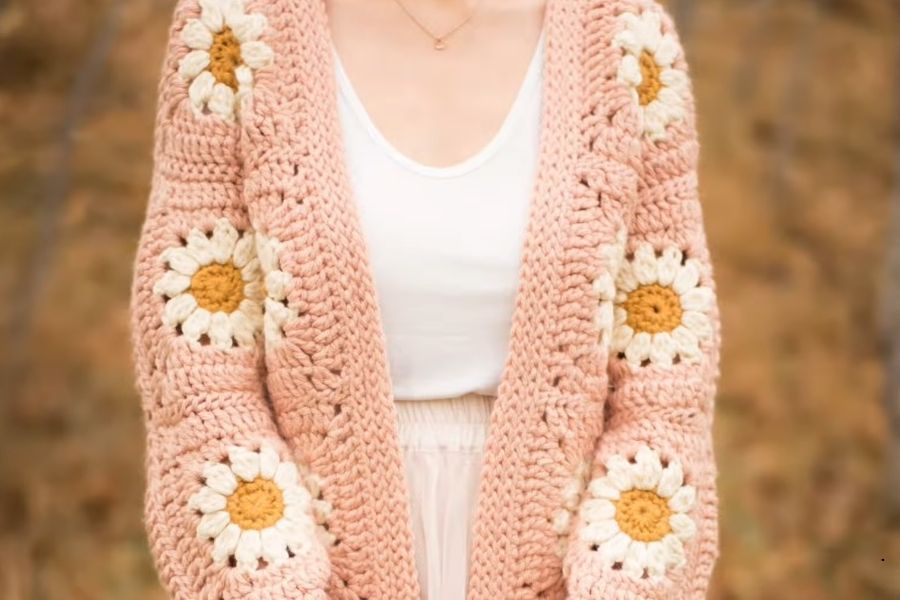
Create a lovely, cozy handmade garment by learning how to crochet a cheerful daisy cardigan featuring beautiful floral motifs, textured ribbing, and comfortable oversized sleeves using simple everyday techniques.
Materials and Hook Sizes
Making this gorgeous piece requires a few basic supplies. You will need your favorite chunky yarn in colors that make you happy, such as a soft pink for the main body alongside sunny yellow and cream for the lovely flower squares. Keep a yarn needle handy for sewing pieces together, a pair of scissors, a felting needle to secure yarn ends securely, and stitch markers to keep your rows neat and aligned. You will also use different crochet hooks depending on the section you are working on, including a larger hook like a 10 mm for the textured collar and a 7 mm hook for creating sturdy bottom ribbing and neat cuffs.
Joining the Daisy Granny Squares
The foundation of this charming garment relies on stitching individual floral squares together. Start by placing the wrong sides of your completed flower squares facing you. Thread your yarn needle and use a simple whip stitch method, inserting your needle through both the front and back loops of adjacent squares. When you approach the corners, remember to split the chains in the chain-two spaces neatly to avoid any awkward bunching. Once your back panel and front panels are fully seamed together, arrange them properly and stitch the shoulder seams and sides while leaving cozy spaces open for the armholes.
Building the Collar and Ribbing
Adding structured borders transforms a simple collection of squares into a polished, professional-looking sweater. For the bottom ribbing, join your yarn along the lower edge and work rows of single crochets into the back bumps of your starting chain, connecting them securely to the body with slip stitches. When working on the collar around the front opening, start with single crochets and switch to a larger hook for working loose slip stitches in the front loops only. Always keep your slip stitches loose and relaxed so that the neckline does not become too dense or start to bunch up awkwardly.
Sleeves and Final Finishing Touches
The sleeves bring the entire cozy design together beautifully. Seam four floral squares together for each sleeve, and add rows of double crochet stitches if your specific size requires extra width. Join your work in a round, and decrease your double crochets gradually to taper the sleeve opening before starting your ribbed cuffs. Work your cuffs using back loop slip stitches for wonderful elasticity. Once all your sleeve and body seams are sewn up nicely, use a felting needle to give any loose yarn ends a few gentle jabs so they stay firmly locked in place without popping out.
As a helpful tip, always take your time when seaming pieces together and avoid pulling your yarn too tightly. Pulling too hard causes the fabric to bunch up and lose its lovely drape.
Another great trick is to use stitch markers liberally before you start sewing long seams. Marking your corners and midpoints keeps everything straight and saves you from having to frog your work later.
Finally, remember to block your completed garment gently. Blocking smooths out all your stitches, evens out the granny squares, and gives your handmade creation a gorgeous, store-bought finish that feels wonderful to wear every single day.