Springtime in Paris Collar Pattern for Effortless Romantic Elegance
Imagine strolling down a sunlit Parisian boulevard with a gentle breeze catching the edges of a crisp, handmade accessory. The Springtime in Paris Collar Pattern brings effortless romantic elegance to your wardrobe with its clean lines and timeless drape.
Exploring the Parisian Collar Design
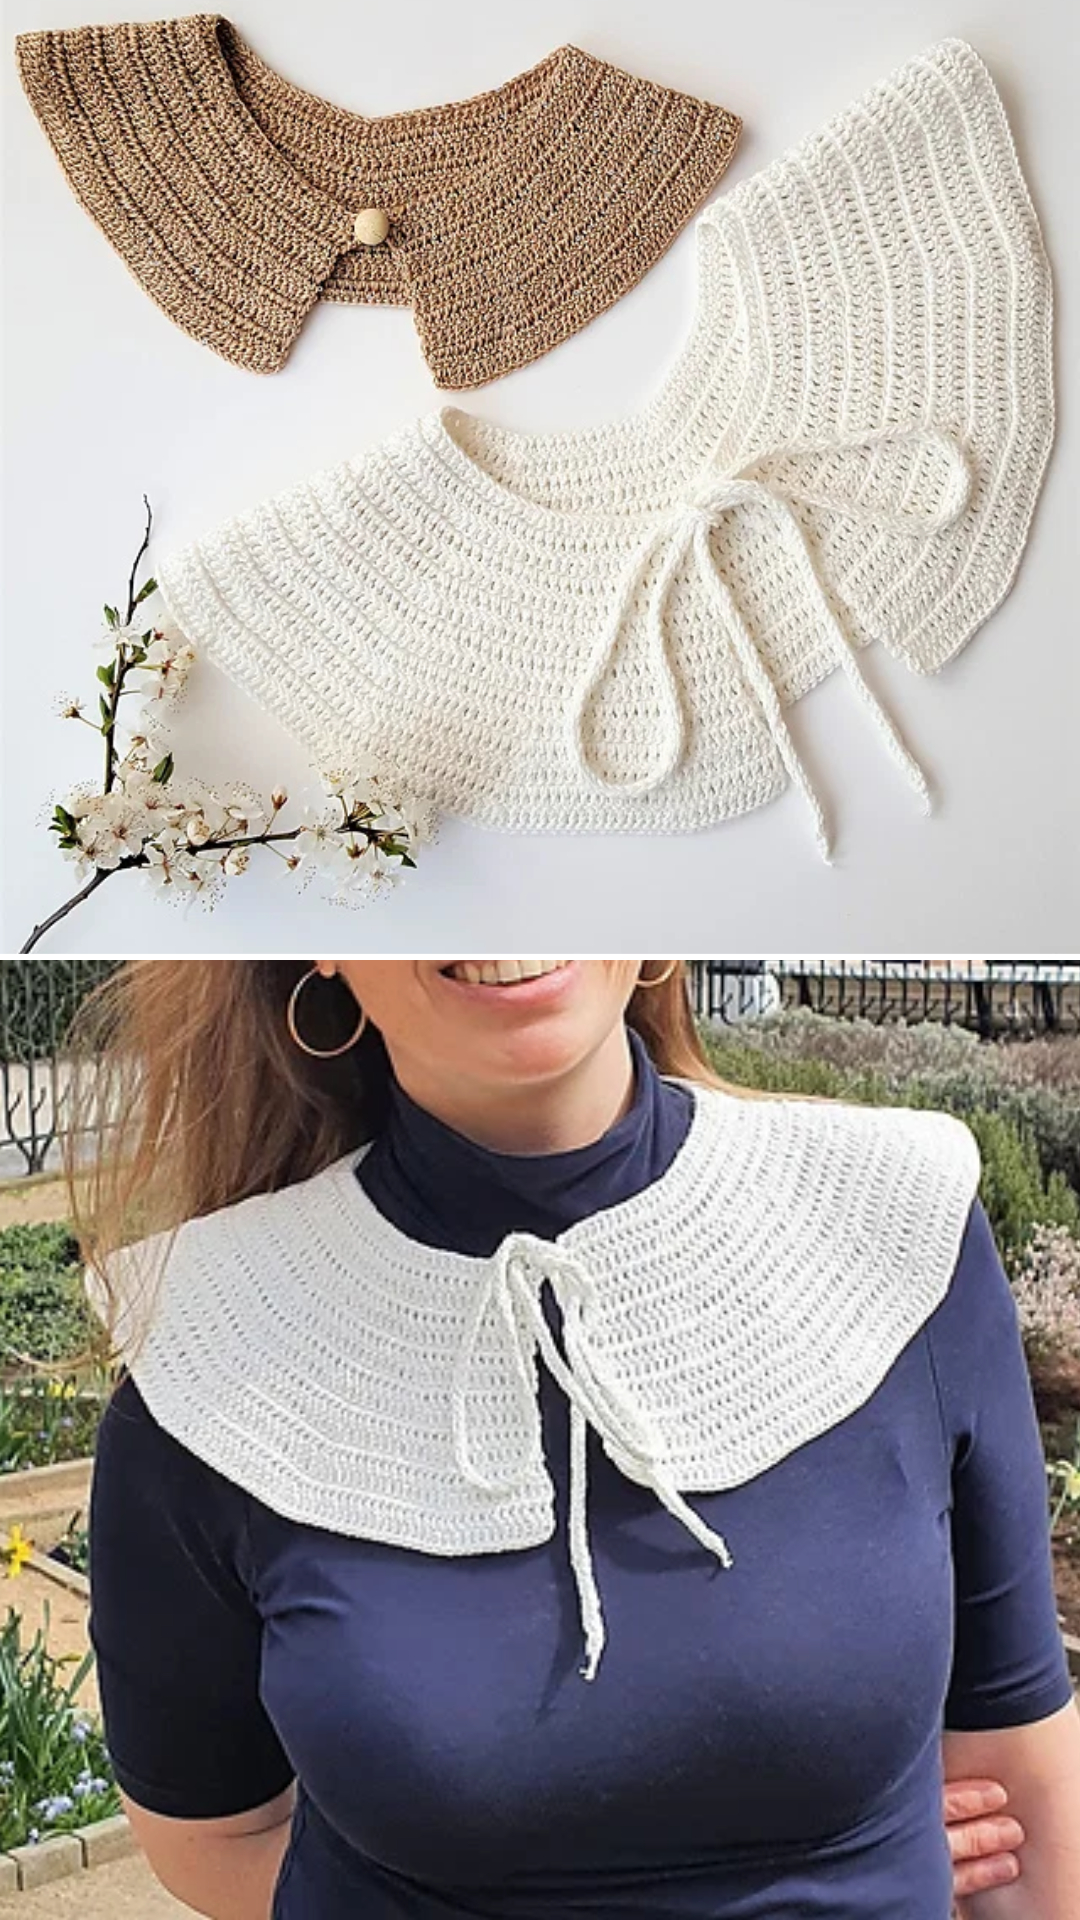
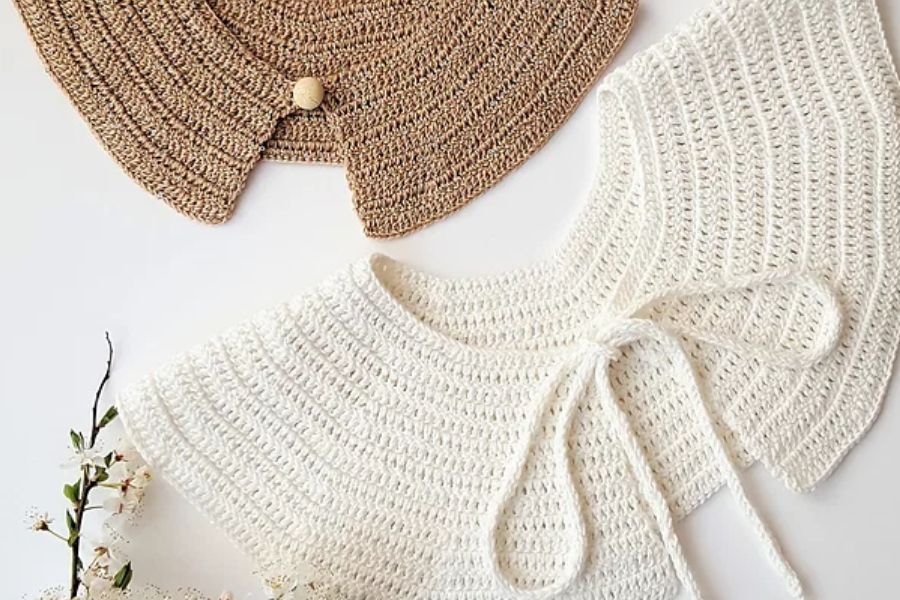
This charming accessory features a wide, gently flared silhouette built from clean, rhythmic rows of vertical stitches. Its structured ribbed texture drapes gracefully across the shoulders, offering a polished look without feeling overly fussy.
You can style this versatile piece in two lovely ways depending on your mood and outfit. Choose a dramatic, wide crisp white collar fastened with delicate front ties, or opt for a slightly more compact golden-tan version closed with a single wooden button.
Essential Materials and Yarn Choices
To make this collar, you will need group 2 sport-weight yarn, using about 137 to 273 yards or 125 to 250 meters depending on the style you pick. A wider white collar typically requires around 100 grams of yarn, while a smaller gold collar needs only 50 grams.
Great yarn options include Patons North America Grace, Schachenmayr Catania Solids, Rowan Summerlite DK, and Garnstudio DROPS Loves You 9. You will also need a 2.5 mm crochet hook, scissors, stitch markers, a measuring tape, an optional button, and a tapestry needle.
Skill Level, Gauge, and Sizing
Written in clear USA crochet terms, this beginner-friendly pattern comes as a handy seven-page digital PDF that is easy to read on mobile devices. The finished collar is designed to fit comfortably with an inner neck circumference of about 44 to 45 centimeters, or 17 inches.
Checking your gauge before starting helps ensure your accessory sits flat and measures accurately. With a 2.5 mm hook, aim for 24 double crochet stitches and 12 rows to equal a 10-centimeter or 4-inch square.
Key Techniques and Stitch Construction
The pattern relies on simple foundational skills, including the chain stitch, slip stitch, double crochet, and working two double crochets into a single space for gentle shaping. You will also learn how to work into the back bump of your foundation chains, which creates a smooth, professional neckline edge.
Depending on how you want to fasten the front, you have two easy closure options. You can crochet a sleek optional I-cord tie for a romantic bow, or sew on a simple button for a neat, classic finish.
Helpful Tips and General Advice
Taking the time to work into the back bump of your starting chain makes a huge difference in how the collar rests against your skin. It prevents the neckline from stretching out of shape and gives the top border a clean, finished appearance right from the start.
Keep your stitch markers close by to mark your increases at the beginning and end of each row so your collar flares out evenly. If your tension tends to be tight, switching to a slightly larger hook just for your initial foundation chain will keep the neck edge flexible.
Finishing and Styling Your Collar
Once you finish your final row, weave in your yarn ends securely with a tapestry needle and give the fabric a gentle steam or wet block. Blocking relaxes the cotton fibers, straightening out the vertical rows and helping the wide, flared edges lie completely flat against your clothing.
This romantic collar pairs effortlessly with a simple linen sundress, a cozy fitted cardigan, or a classic crewneck sweater. Because it is lightweight and detachable, you can easily slip it into your tote bag to elevate a casual daytime look in seconds.