Strawberry Crochet Pattern Free to Stitch Sweet Summer Vibes
Nothing captures the sunny joy of summer quite like a plump, sweet berry sitting right in the palm of your hand. With a few basic stitches and plush yarn, you can whip up an adorable amigurumi strawberry that brings instant warmth and cheer to any desk or shelf.
Discovering the Cute Strawberry Design
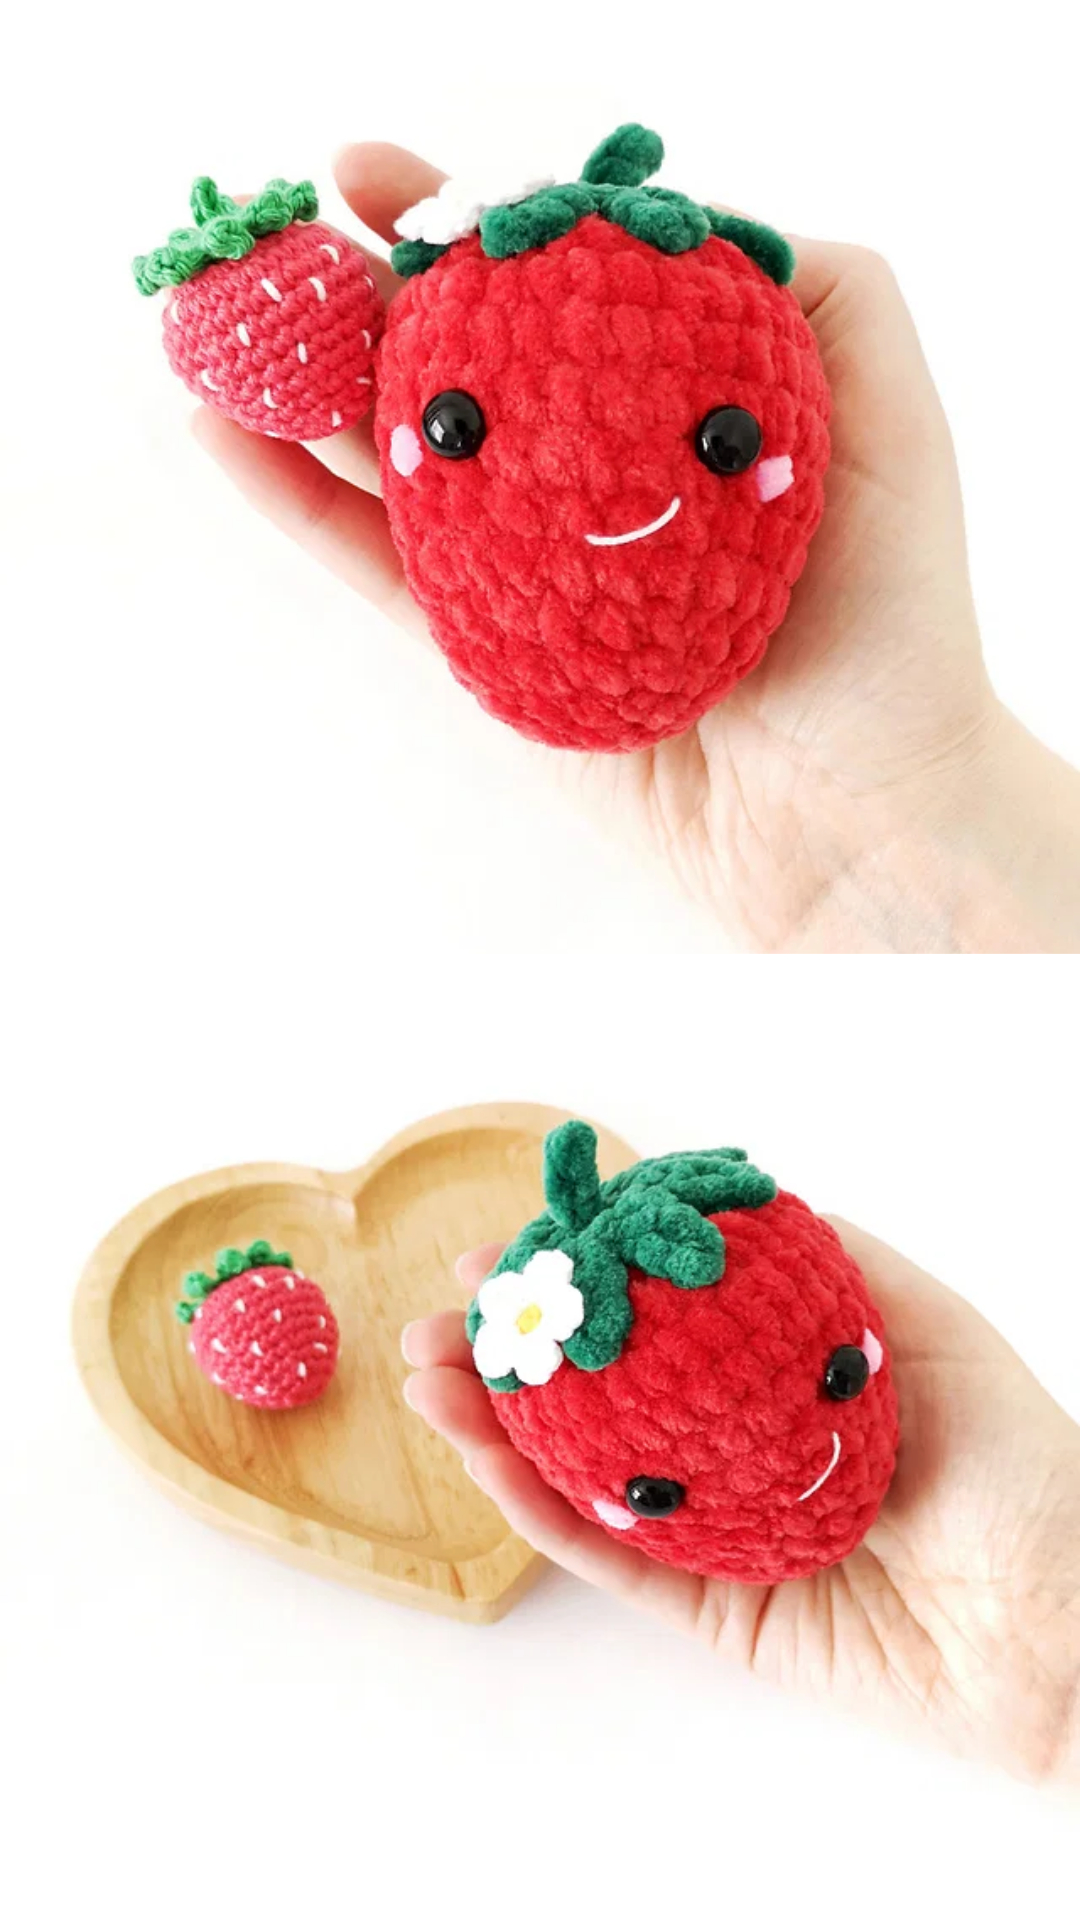
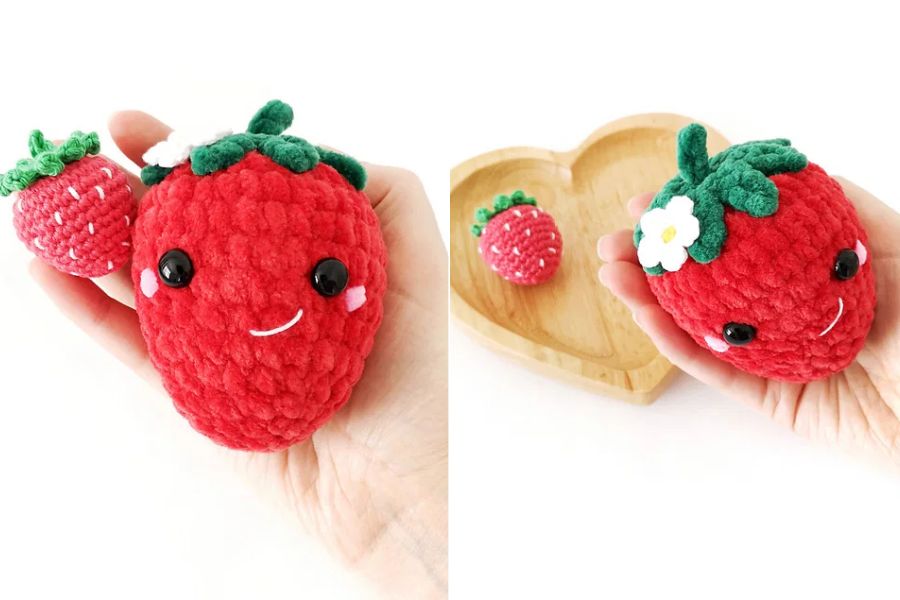
This charming plush berry features a soft, squishy red body topped with leafy green accents, a cute stem, and a dainty white blossom. Its sweet little face, complete with glossy eyes, rosy pink cheeks, and a tiny stitched smile, makes it an irresistible pocket-sized companion.
Measuring approximately 4 inches tall by 3 inches wide including the stem, this berry fits comfortably in your hand. While gauge is not strictly critical for this toy, changing your yarn thickness or hook size will naturally adjust the final dimensions.
Materials and Tools You Will Need
To build the main plush berry, gather super bulky yarn in emerald green and cardinal red, such as Premier Yarns Parfait Chunky, alongside a 4.5 mm hook. For the delicate five-petal flower, you will also need DK weight cotton yarn in yellow and white, such as Paintbox Yarns Cotton DK, paired with a 2.5 mm hook.
You will also want a pair of 10 mm safety eyes, polyester fiberfill stuffing, and 4-ply white yarn or embroidery floss for the smile. Keep a removable stitch marker, yarn needle, sharp scissors, and fabric glue or hot glue nearby to finish everything neatly.
Key Techniques and Stitch Construction
The pattern is written in standard US crochet terminology and worked in a continuous spiral without joining rounds. You will use foundational skills like single crochet, increases, invisible decreases, double crochet, and working in the back loop only.
Working into the back loop only during the second round leaves exposed front loops at the top of the berry. Later on, you will attach your green yarn directly into those leftover loops to crochet eight neat leaves around the crown.
Step-by-Step Strawberry Assembly
Begin the main body at the top with green yarn, quickly switching to red to shape the plump berry down to a rounded tip. Before closing the bottom with an invisible fasten off, insert the safety eyes between rounds seven and eight and stuff the body firmly with fiberfill.
Next, crochet the eight leafy points directly onto the top loops, and craft a sturdy four-stitch i-cord or simple chain for the green stem. You can also stitch up the optional yellow-and-white blossom using your smaller hook and cotton yarn for an extra touch of garden charm.
Helpful Tips and General Advice
Because amigurumi pieces are worked in continuous spirals, placing a removable stitch marker in the first stitch of every round keeps your counting completely accurate. Using the invisible decrease technique will also prevent unsightly gaps from forming as you taper the bottom of the berry.
If you want to try a fun twist on the classic berry, simply switch to brown yarn after round five to create a chocolate-dipped treat. Taking your time to stuff the berry evenly as you go ensures a smooth, plump shape without lumpy spots.
Finishing Touches for Sweet Personality
Gently stretch each green leaf downward and pin them evenly around the top before securing the tips with a tiny dab of fabric glue. Sew the stem right at the crown and attach the little white flower just above the left eye for a balanced look.
Finally, use white embroidery floss to stitch a tiny off-center curved smile, and add soft pink yarn dashes just beneath each eye for blushing cheeks. Once your ends are tucked safely inside, your sweet summer strawberry is ready to display or gift to a friend.