Stunning Caelia Crochet Snowflake Ornament Pattern
Winter brings a special kind of magic to our homes, and nothing captures that frosty charm quite like handmade holiday decorations. With just a bit of cotton thread and a small hook, you can transform simple loops into an intricate piece of winter art.
Discovering the Caelia Snowflake Design
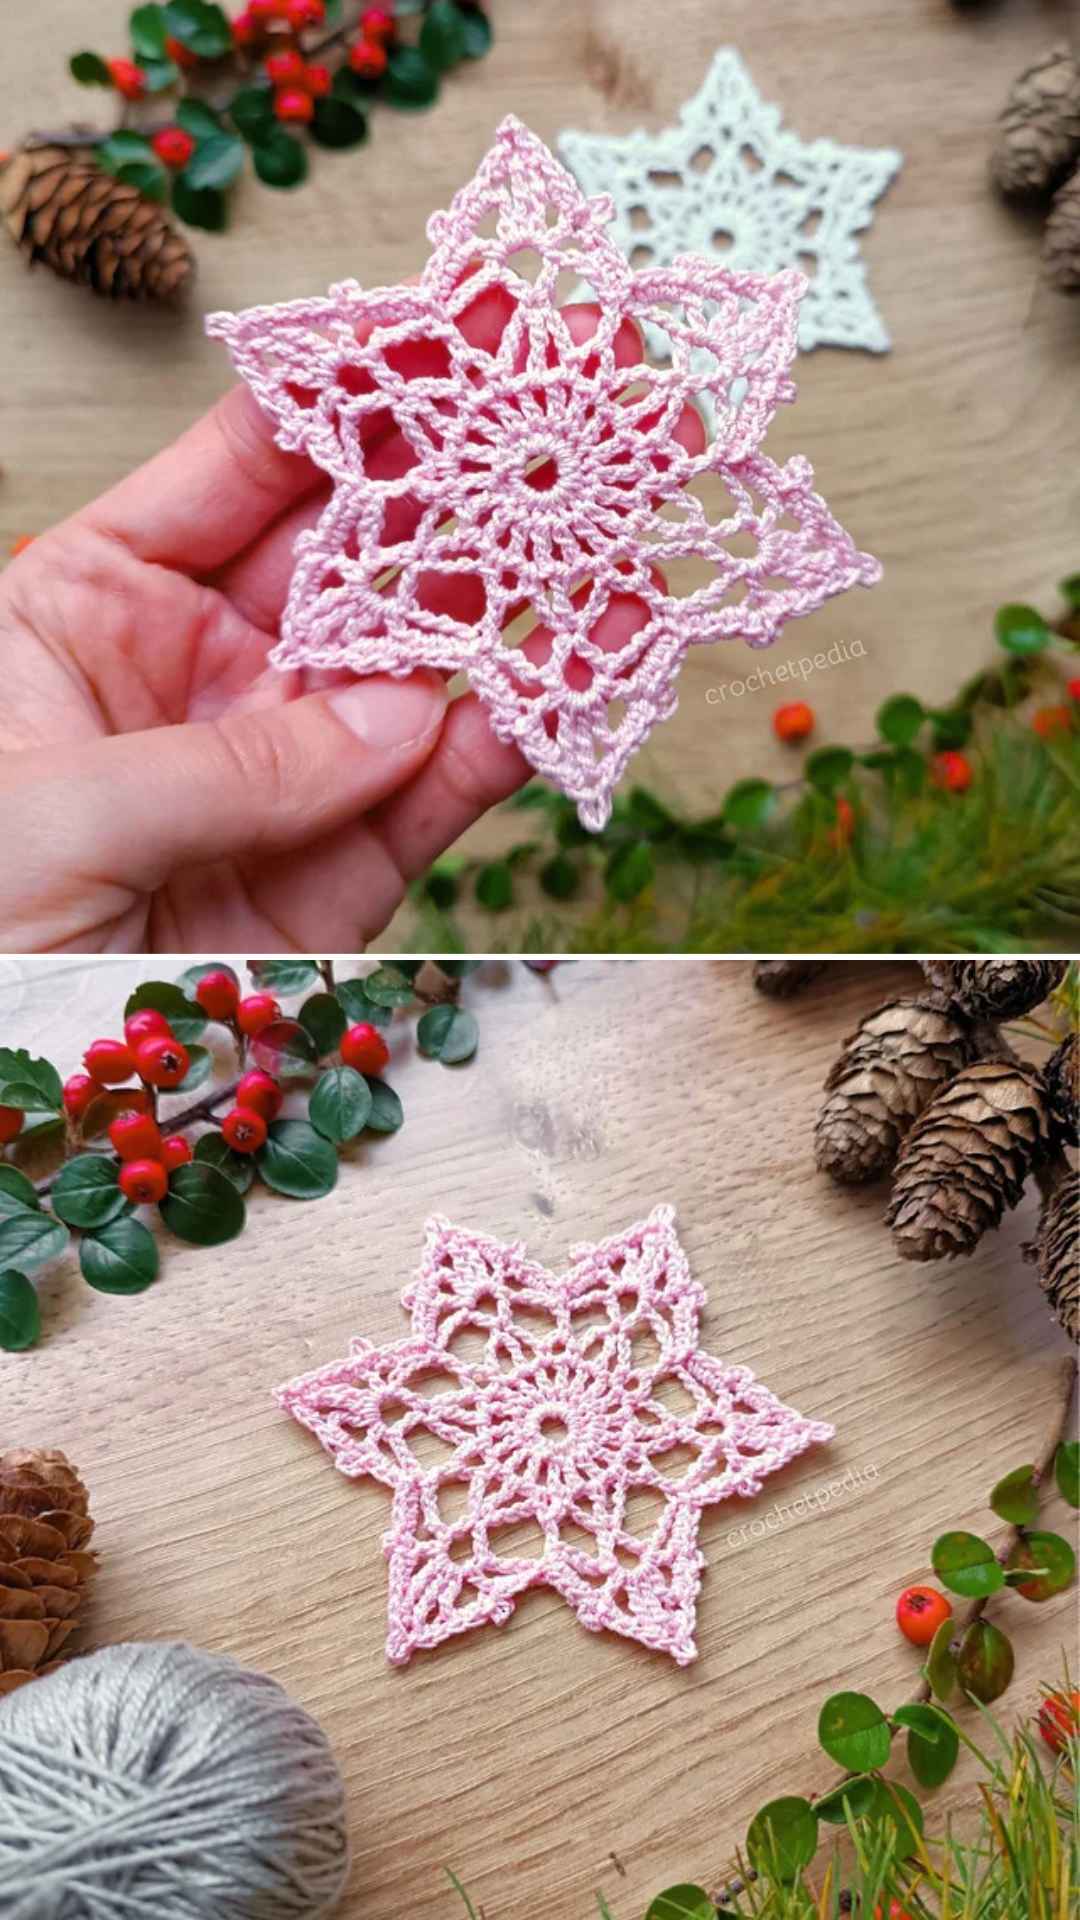
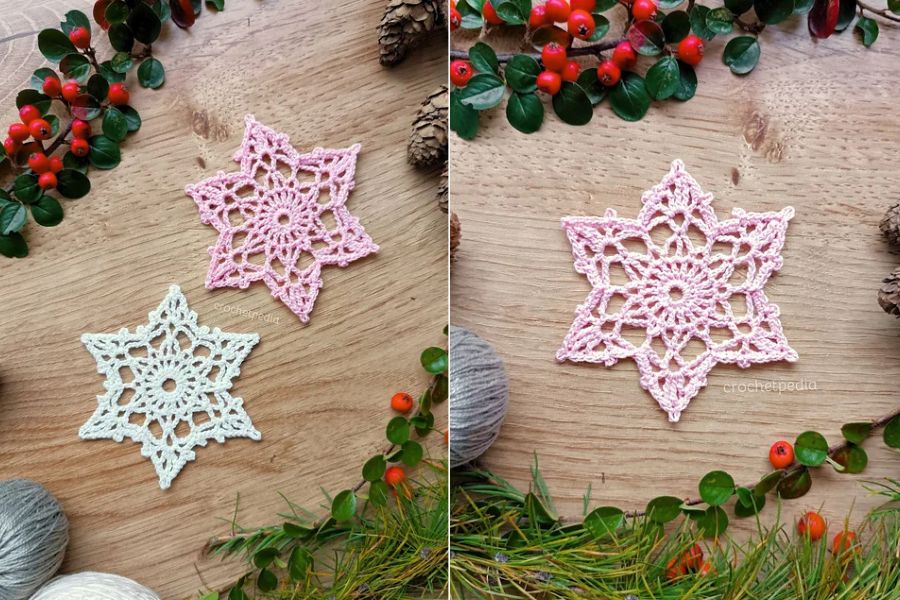
The Caelia snowflake is a delicate six-pointed star that blends classic lacework with crisp, modern geometry. Its open circular center radiates outward into six distinct, sharply pointed arms edged with tiny decorative bumps that mimic real ice crystals.
Measuring around 9 cm or 3.5 inches across, this dainty ornament is the ideal size for hanging on a Christmas tree or tying onto a wrapped gift. While classic crisp white gives it a traditional frosty look, soft pastel shades like blush pink also bring out the lovely lacy texture of the stitches.
Materials and Tools You Will Need
To achieve that crisp, delicate lace look, you will want to use 100% cotton crochet thread rather than thick yarn. Suggested options include Aunt Lydia’s Classic 10 Crochet Thread or Scheepjes Maxi Sugar Rush, though any similar thread weight works wonderfully.
Pair your thread with a small 1.5 mm crochet hook to keep the stitches tight, neat, and well-defined. You will also need a sharp pair of scissors for snipping your ends cleanly, along with rust-proof pins and stiffening solution for finishing.
Skill Level and Key Techniques
This pattern is best suited for an upper beginner who already feels comfortable working in the round and managing finer thread. It is written in standard US crochet terms, making it easy to follow along step by step.
You will use a mix of basic and tall stitches, including the magic ring, chain, slip stitch, single crochet, double crochet, treble crochet, and double treble crochet. The pattern also features a lovely mock picot, which is worked by making a slip stitch, three chains, and another slip stitch all into the same spot.
Step-by-Step Caelia Crochet Pattern
Begin your snowflake by forming a magic ring to keep the center hole neat and adjustable. For Round 1, work 18 single crochets directly into the loop, pull it closed, and join with a slip stitch.
Move on to Round 2 by chaining 3, then repeat the sequence of 1 double crochet and 1 chain seventeen times around. Finish this round by working 1 slip stitch into the second chain of your starting chain to create a spoked wheel.
Start Round 3 by working 1 single crochet in the chain space, followed by 3 chains, 1 treble crochet in the next chain space, 3 chains, 1 single crochet in the next chain space, and 3 chains. Repeat this entire sequence six times around the circle, then join with a slip stitch into the very first single crochet.
For Round 4, make 1 slip stitch into the small chain space behind your hook and chain 6. Repeat the following six times around: work 1 double crochet, 3 chains, and 1 double crochet all into the treble crochet from the previous round, then chain 4, place 1 double crochet into the small chain space, and chain 4, finishing with a slip stitch into the second starting chain.
Begin Round 5 by chaining 3, then work a large cluster of 1 double crochet, 2 chains, 1 treble crochet, 1 chain, 1 double treble crochet, 1 chain, 1 treble crochet, 2 chains, and 1 double crochet all into the small chain space. Follow this with 3 chains and 1 slip stitch on top of the double crochet from the previous round, repeating this dramatic point six times.
Complete the lacework in Round 6 by working 3 single crochets into the chain space, a mock picot of slip stitch, 3 chains, and slip stitch in the double crochet, 2 single crochets into the next chain space, and 1 slip stitch into the treble crochet. Continue up the peak with 1 single crochet between the treble and double treble stitches, a mock picot in the top stitch, 1 single crochet on the other side, 1 slip stitch into the treble crochet, 2 single crochets into the next chain space, a mock picot in the double crochet, 3 single crochets into the chain space, and 1 slip stitch into the Round 4 double crochet, repeating this six times.
Your final slip stitch acts as your finishing stitch to lock the entire snowflake together. You can either cut the thread and weave in the ends neatly, or crochet a simple chain loop right at the tip and slip stitch it to the base for easy hanging.
Helpful Tips and Tricks for Success
Keep in mind that your personal tension, hook size, and chosen thread thickness will all slightly change the final size of your ornament. If you notice your edges curling or looking uneven while you stitch, do not worry because cotton thread naturally relaxes once it gets wet.
Working with a tiny 1.5 mm hook can feel tricky at first, so make sure you sit in a well-lit area to see every tiny loop clearly. Taking short breaks to rest your hands will keep your tension consistent from the center ring all the way to the outer picots.
To keep your mock picots looking sharp and uniform, pull your slip stitches snug right before and right after making the three chains. Counting your stitches at the end of the first three rounds will also save you from having to unravel delicate thread later on.
Blocking and Stiffening for a Crisp Finish
Blocking and stiffening are truly the secret steps that transform a floppy piece of thread into a stunning heirloom ornament. Without proper shaping, the delicate points and lacy arches simply will not hold their crisp star shape when hanging on a tree.
Start by soaking your finished snowflake in a fabric stiffener, liquid starch, or a simple mixture of white glue and water until the cotton fibers are fully saturated. Gently squeeze out the excess liquid with a clean towel without twisting or wringing the delicate lacework.
Lay the damp snowflake onto a foam blocking mat and use rust-proof pins to stretch every single arm and mock picot outward into symmetrical points. Let it dry completely overnight before removing the pins, and your Caelia snowflake will stay stiff, flat, and gorgeous for many winters to come.